Description[]
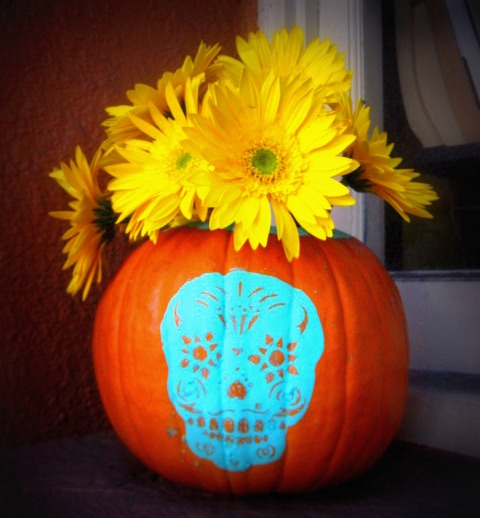
I haven't played with stencils since I was a little kiddo; I remember it as being a pretty calming and meditative way to pass the time; all that tracing and filling in. Many years later, things haven't changed a bit! I've been experimenting with stencils from Ed Roth's new book, Stencil 201, with all kinds of fun results! Here's my first Stencil 201 project. In keeping with the spooky season, I wanted to see what would happen if I stenciled on a pumpkin; I'll take you step-by-step through my process! Oh, and here's a link to a great interview with the man himself, Ed Roth, talkin' stencils and being awesome!
Type of Craft[]
Painting
Difficulty Level[]
Easy
Supplies Needed[]
- Pumpkin (try to find one with at least one flattish side)
- Stencil of your choice (I chose the sugar skull from Stencil 201, but there are lots more to choose from!)
- Acrylic paint, any color
- Toothpick or pen
- Mason jar or vase
Directions[]
1. Wash your pumpkin and cut a big hole in the top, in classic carving style. Pull out all the innards with a spoon and discard (or save the seeds for roasting!)
2. What I did here was a bit backwards, but I really like the result. If you have a detailed stencil, trace the main outline of it and fill the whole thing in with paint. Let dry.
3. Now for the fun part! Place the detailed part of the stencil over your painted area and tape on. Since the pumpkin is curved, it can be a little tricky to tape if your stencil is larger, but it's okay.
4. With your toothpick or pen, scrape the paint off the exposed areas of the stencil. It should come right off and you'll be left with your pumpkiny image!
5. You're done! If you like, place a mason jar filled with flowers inside the pumpkin for a crazy festive vase!
Additional Photos[]
")
")
")