Description[]
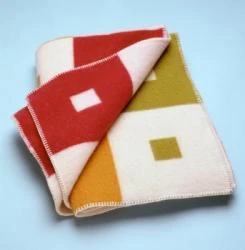
Learning how to make a fleece blanket doesn't have to be difficult. Fleece is so easy to work with that only minimal sewing skills are required to make a pretty handmade blanket. And, if you don't feel comfortable sewing, you can simply tie the ends of your fabric together to make a cozy no-sew fleece covering.
Sewing Difficulty[]
Beginner
Materials[]
Fleece is a relatively affordable fabric, which makes it a frugal option when you need to create handmade gifts for several different people. The fabric does not need hemming and is very easy to work with even if you have minimal sewing skills. In fact, you can learn how to make a fleece blanket in about 30 minutes.
Sewing Instructions[]
1. Trim off the selvage edge of the fabric, if needed.
2. Mark a rounded edge on the corners of your blanket. Use a dinner plate as a template to help you trim the corners evenly if you don't have a circle cutter handy.
3. Serge the raw edge of the fabric to help your blanket hold its shape.
4. Add a decorative edge, such as the blanket stitch. Experiment with yarn and embroidery floss to create interesting looks for your blanket.
5. If desired, add a monogram or other embroidery element to the blanket. Appliqués can also be a nice touch for personalized your fleece blanket.
Non-Sewing Instructions[]
1. Cut your fabric to the appropriate dimensions. Fleece blankets can be made as small throws or as larger blankets, although you will want to keep in mind that most fleece fabrics are 50 to 60 inches wide. Trim off selvage edges and square up your fleece as needed.
2. Place the two pieces of fabric over each other with the wrong sides together.
3. Cut a four to five-inch square from each corner.
4. Use your quick-cut guide and rotary cutter to cut your fringe. Depending upon the look you prefer for your blanket, fringe may be cut in one half or one inch increments.
5. Use a seam ripper to make a small slit in the top of each piece of fringe. Feed the end of the fringe through the back side of the slit, being careful not to stretch the fabric. (Alternatively, you could try tying your fringe together with a simple overhand knot to secure the fleece squares.)
References[]
This sewing project comes from lovetoknow.com